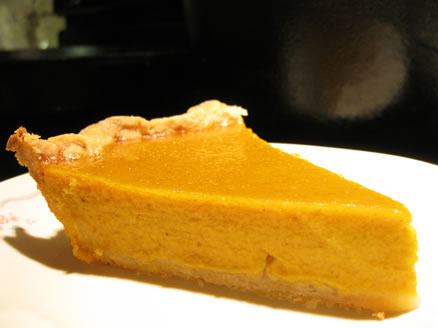
How to make a Fresh Pumpkin Pie using real pumpkins with Recipe
Posted by Warren
Makes two 9-inch pie, single crust, custard filling. Total time
What is the best Pumpkin to use in pie?
How can I tell when my Pumpkin Pie is done?
Is it possible to freeze the pie?
All of these questions will be answered plus more…
Canned pumpkin makes a great pie but fresh pumpkin makes a fantastic pie that only the few will ever have a chance to taste.
This is the way it was really done, taking a real pumpkin and cooking it down to extract the sweet and juicy flesh. It might be oldfashion, but what other way would you make a pumpkin pie from scratch?
If you never had pumpkin pie made with fresh pumpkin, you got to experience the organic taste once. The recipe for this fresh pumpkin pie can be used for canned pumpkin puree as well.
We will hold your hand. Do not fret, we will make the process easy. Just follow the step by step instructions, the How To for real fresh pumpkin pie. Believe us when we say it is not hard it just takes a little time.
Step 1. Choose your pie pumpkin
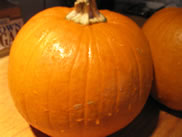
Not all pumpkins are created equal, some are for eating and some are for looks, just art.
Get a Pie Pumpkin – Not those large horrid Jack-O-Lantern pumpkins.
- Use a pie pumpkin, sugar pumpkin or a bright colored butternut squash for pies.
- Do Not use anything huge. Their flesh will be bitter, tough and stringy.
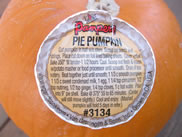
- Choose a pumpkin that feels solid and heavy for its size.
- Choose a pumpkin that has uniform orange coloring throughout.
- Turn the pumpkin over and place pressure on the bottom with your thumbs. If it flexes or gives your pumpkin is not fresh.
- It should be free of blemishes. Look for soft spots, mold, wrinkles or open cuts that would indicate damage or early spoilage.
- Choose a pumpkin with a solidly attached stem. A green stem indicates a freshly harvested pumpkin.
Step 2. Clean your pumpkin
Wash the outside of the pumpkin with a little of bleach water or just vinegar. Rinse the pumpkin with cool water.
Step 3. Remove the stem to the pumpkin
It is not easy to snap off. One way to remove the stem if it is long enough is to just hit it off. Hold the pumpkin firmly and whack the stem against a hard surface like a granite or tiled countertop.
Alternatively, you can pry it off by wedging a strong spoon just beneath the stem where it attaches to the pumpkin body. Give the spoon a good push until the stem snaps off. On the other hand, just use a serrated knife and saw the little bugger off.
Step 4. Cut the pumpkin
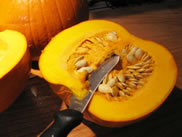
Cut the pumpkin in half with a serrated knife lengthwise. Be careful using just a smooth sharp knife. The rinds or flesh of the pumpkin are so tough that the knife could slip or break, and you might accidentally cut yourself or lose a finger.
Step 5. Revome the stuff inside
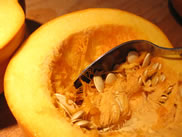
Use a large metal spoon to scrape out the stuff inside the pumpkin. Scrape the walls of the fibery stringy stuff along with the seeds.
Save the Pumpkin Seeds:

Use it for next years’ garden. Clean the seeds with cool water with some bleach. Let the seeds dry and store in a cool and dark place. Or toast the seeds with a little of oil either olive or corn. We prefer corn oil. You sprinkle the crunch seeds over a garden salad. They give a delightful kick to the salad.
Step 6. Slice the pumpkin some more
Slice up the fresh pumkin into quarters then into eights if pieces are still quite large. We need it small enough to all fit in your large pot.
Step 7. Cook the pumpkin
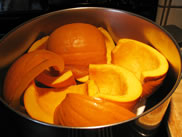
If you have a steamer use it. If not just use three small metal measuring cups. Space them evenly on the bottom of a large pot. Place a glass plate on top of these cups and fill the bottom with some water. Apply medium high heat to pot. Steam the pumpkin for 20 – 40 minutes or until all the pieces are tender.
Step 8. Check for doness
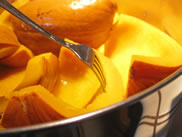
With a fork prick the pumpkin pieces. It should push easily through the skins and flesh when done. The pumpkin flesh should just about fall off their skins and be easy to spoon out.
Step 9. Remove the pumpkin skins
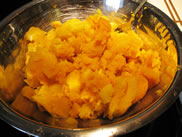
Use a large spoon to scoop the sweet tender flesh from the skins. Put these pumpkin pieces in a large bowl. If they do not feel tender, cook them longer.
Step 10. Puree the pumpkin
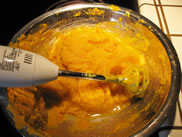
To get a smooth pumpkin puree. Put the pumpkin flesh in a blender, a food processor, or just use a hand mixer. Examine your puree closely. Remove anything that is not orange, like black flecks.
Step 11. Fresh pumpkin puree is done
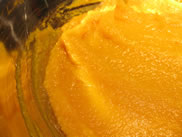
You made it! After you clean up the mess you made you are done with the pumpkin. You now have a pumpkin product that no canned puree pumpkin can match in flavor or vivid color.
This puree will give your pumpkin pie a lovely defined warm orange color.
Step 12. Making the fresh pumpkin pie filling
Now for the easy part, making the filling of the fresh pumpkin pie.
Interested in Pumpkin Pies?
How to Save your Leftover Pumpkin Pie Slices.
Top rated canned pumpkin purees you can buy…
Libby´s Famous Pumpkin Pie Recipe – It´s good but in Danger!
Bake a Pumpkin Pie for less than three dollars, but Beware!
Can I freeze my homemade Pumpkin Pie? Yes. But how?
—Fresh Pumpkin Pie Recipe Ingredients—
Pastry dough – two crust
The secret
of making
a flaky pie crust.
3 cups all-purpose flour
4 tablespoons sugar
1/2 cup ice cold water
1/2 teaspoon fine salt
1 cup (2 sticks) cold unsalted butter
1 teaspoon cold corn oil
Filling for two pies
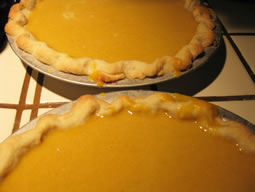
4 cups fresh pumpkin puree
2 cups half and half milk
1 cup heavy cream
1 1/2 cups sugar
1/2 cup pure maple syrup
4 eggs whole
2 egg yolks
1 teaspoon vanilla
1 teaspoon ground cinnamon
1/2 teaspoon ground ginger
1/2 teaspoon salt
1/4 teaspoon ground mace
2 pinches ground cloves
Directions
1. Prepare your favorite pastry: Roll the pastry and line a 9-inch pie plate with the bottom crust. Chill the pastry for at least 15 minutes.
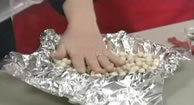
More Help – How to mix the pie crust ingredients.
2. Line the crust with foil and add your pie weights.
3. Put the pie crust in a 400° F oven for 15 minutes.
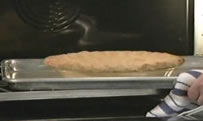
4. Take the pie crust out of the oven. Remove the pie weights and foil.
5. Rotate the pie crust in the oven and bake for 5 to 10 minutes more or just when edges start to brown.
6. Filling – In a large sauce pan add the fresh pumpkin, sugar, maple syrup, salt, ginger, cinnamon and mace.
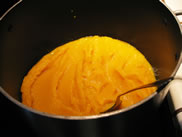
7. Cook this over medium heat for about 15 minutes. This will concentrate the flavors and add a more pumpkin taste to the puree.
8. Build the custard portion in a large bowl. Add the cream, half and half, eggs, yolk and vanilla. Whisk the ingredients.
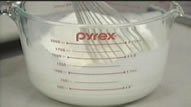
9. Add the custard mixture to the pumpkin slowly, stirring at the same time. Continue mixing until it is combined.

10. Pour the warm pumpkin mixture slowly in to a warm pre-baked pie crust.
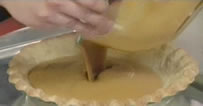
11. Bake the pumpkin pie in a 400° F oven for 10 minutes. Turn the heat down to 325° F and bake for 30-45 minutes longer.
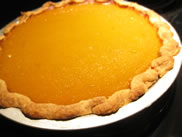
Check for doneness in two ways:
a) Give it a little shake and the very center should jiggle a little bit. The filling should still be firm but wiggle some in the center.
b) Or take a temperature in the center, and it should register about 175° F.
The filling will still cook a little when removed from the oven. If you wait until the center is set, it has over cooked. You will get cracks, especially along the edges of the filling.
12. Let the pie cool for 2 -3 hours. Refrigerate the pie for up to three days or freeze it for one month.
Yes, you can freeze pumpkin pie. But, you must do it the right way. My Freeze Pumpkin Pie page will show you step by step..
Interested in Pumpkin Pies?
How to Save your Leftover Pumpkin Pie Slices.
Top rated canned pumpkin purees you can buy…
Libby´s Famous Pumpkin Pie Recipe – It´s good but in Danger!
Can I freeze my homemade Pumpkin Pie? Yes. But how?
